Who doesn’t love cheese?! It’s delicious, versatile, and pretty easy to make at home.
In this post, we’ll show you how to make ricotta and mozzarella cheese in your own kitchen. We’ll walk you through the process step-by-step, and by the end of it, you’ll be a cheese-making pro!
So let’s get started…
SUPPLIES NEEDED TO MAKE CHEESE AT HOME
The great part of making cheese yourself is you probably have most of the ingredients and tools already. But, in case you don’t, we’ve listed out each component you’ll need for this cheese-making DIY.
Ingredients
- Citric acid – You’ll need to use just a teaspoon or so per batch of cheese
- Cheese salt – 1 to 2 teaspoons per cheese, depending on the type of cheese you go with
- Rennet tablets – You’ll need less than one tablet per cheese
- A gallon of whole milk – regular pasteurized
- Chlorine-free drinking water
- Italian herb blend seasoning (optional)
Tools
- Butter muslin – make sure you get unbleached and food-grade
- Cheese thermometer
- Large stock pot – at least 5 quarts
- Colander or strainer
- Stirring utensil
- Knife
- Ladle
- Large freezer and oven-safe bowl
- Microwaveable bowl
Cheese-Making Kit
Additionally, if you want to get everything at once for this tutorial, GROW AND MAKE has a fantastic cheese-making kit that includes all the ingredients, tools, and supplies you need to make mozzarella, ricotta, mascarpone, and more.
MAKING RICOTTA CHEESE AT HOME
Ricotta cheese is a great place to start if you’re new to making cheese since it’s probably the easiest type of cheese you can make at home.
That’s because it doesn’t require any aging or special ingredients.
All you need is milk, an acid like lemon juice or vinegar, and salt. And the process is equally simple and doesn’t require any fancy equipment.
The recipe below will make around 1 ½ lb of ricotta, so we hope you’re hungry.
Ingredients Needed to Make Ricotta Cheese
- 1 teaspoon of citric acid
- 1 teaspoon of cheese salt – to taste
- 1 gallon of milk
Tools Needed to Make Ricotta Cheese
- 1 large stock pot – at least 5 quart
- 1 sheet of butter muslin/fine cheesecloth
- 1 thermometer
- 1 colander or strainer
- 1 stirring utensil
Yield: 1 ½ lb of Ricotta
That’s a lotta ricotta – we hope you’re hungry!
How to Make Ricotta Cheese at Home
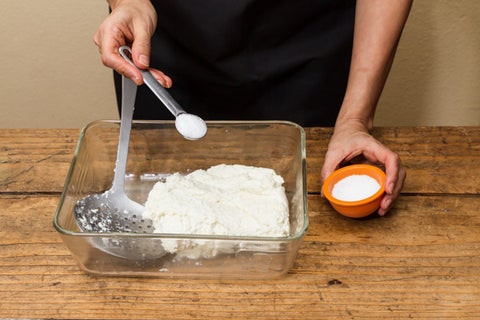
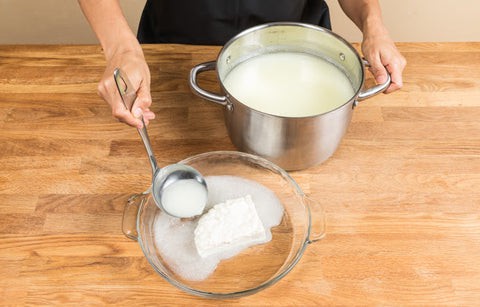
- Measure the citric acid into 1/4 cup of water and stir.
- Pour the milk into the pot. Heat the milk to 185°F (do not allow it to boil over). Stir often to prevent scorching.
- Pour the citric acid solution into the pot of milk and mix thoroughly.
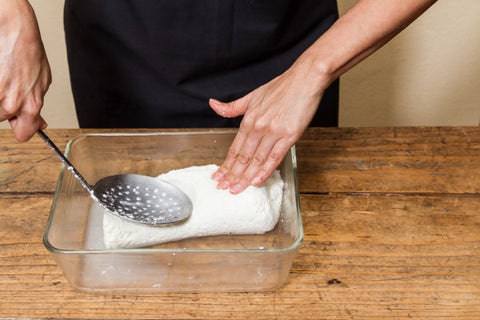
- As soon as the curds and whey separate clearly, turn off the heat. Allow curds to set undisturbed for 10 minutes.
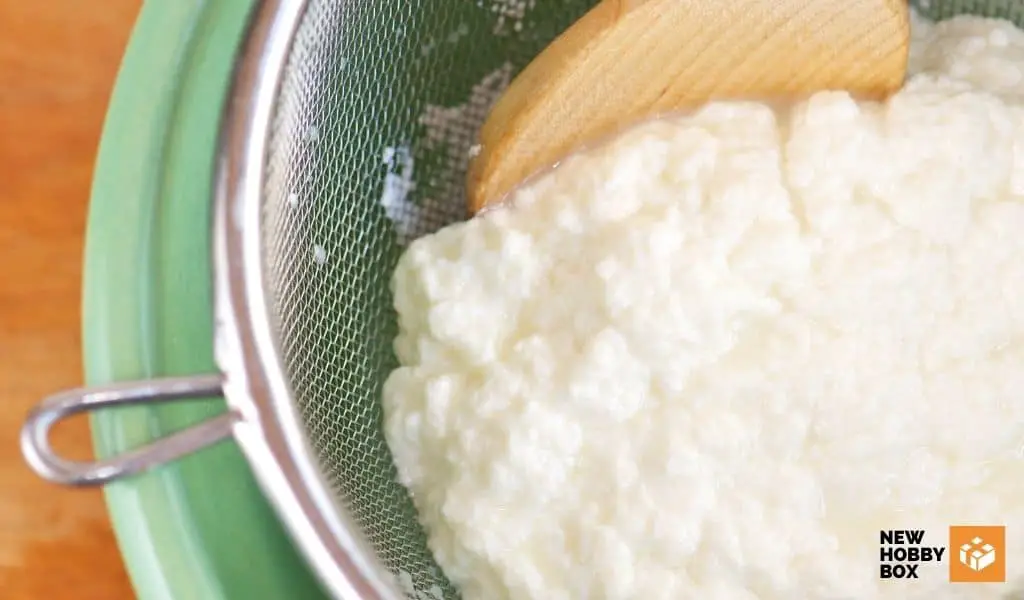
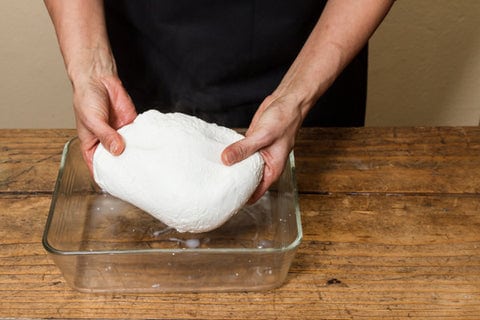
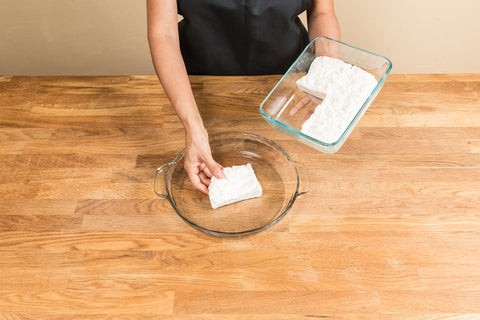
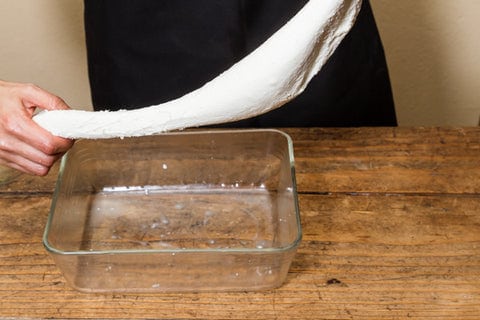
- Line a colander with butter muslin (fine cheesecloth), then drain the cheese curds in the colander for 15-30 minutes, or until the cheese has reached the desired consistency.
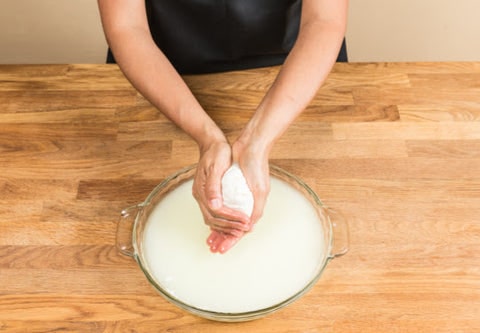
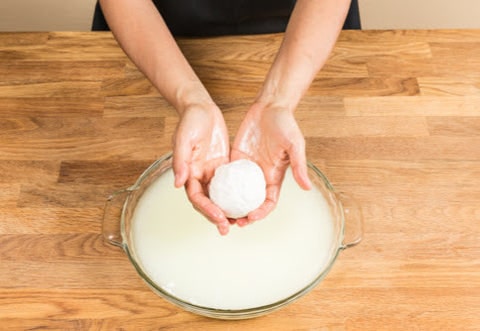
At this point, you can add more salt and any flavorings you’d like… and CONGRATS! You’ve just made ricotta 😉
Told you this one was easy.
The best part is the cheese is ready to eat immediately, however, if you want to store it, you’ll need to cover it and place it in the fridge, and be sure to eat it within a week. It will spoil after 7 days.
Below is a great video on how to make ricotta cheese. For the super visual learners out there, follow the steps above while watching the ricotta-making video – you can use all the ingredients and tools above while following along.
MAKING MOZZARELLA CHEESE AT HOME
Making mozzarella cheese is a bit more challenging than making ricotta cheese. It requires more ingredients, equipment, and steps.
But, don’t let that discourage you – it’s still rather straightforward and we’ll walk you through each step of the process, in great detail.
Also, there are few things better than fresh, homemade mozzarella – which means an edible reward awaits you.
Just like the ricotta recipe, this recipe will make 1 ½ lb of mozzarella – so get ready to have a dinner party.
Ingredients Needed to Make Mozzarella Cheese
- 1 gallon of whole cow’s milk (NOT ultra-pasteurized, regular pasteurized or raw milk are great)
- 1 ½ tsp citric acid
- ¼ rennet tablet
- 1/2 cup chlorine free drinking water
- 2 tsp cheese salt, to taste
- 1 tsp Italian herb blend, or your choice of herbs (optional)
Tools Needed to Make Mozzarella Cheese
- Thermometer
- Knife
- Microwaveable bowl (for microwave stretching method)
- Large heat-resistant bowl and ladle (for hot water stretching method)
Yield: 1 ½ lb of Mozzarella
A mozzarella ball is close to the size of an orange and weighs about 8oz. A mozzarella pearl is about the size of a gumball and weighs close to 1oz. So this recipe could make three mozzarella balls or 24 mozzarella pearls.
How to Make Mozzarella Cheese at Home
- Dissolve ¼ of a rennet tablet into ¼ cup of cool, chlorine-free water. Stir and set aside.
- Wrap the remaining pieces of the rennet tablet and store them in the freezer.
- Mix 1 ½ teaspoon of citric acid into a new ¼ cup of cool, chlorine-free water until dissolved.
- Take the gallon of milk and pour it into the stock pot, then pour the citric acid solution into the milk-filled stock pot, and stir thoroughly.
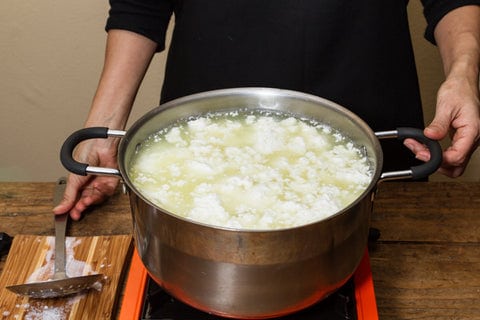
- Heat the stock pot to 90°F at medium heat, stirring occasionally and checking the temperature often. Stay close to the pot during this step, timing and temperature are important here.
- Once the liquid in the stock pot hits 90°F, slowly stir in the rennet solution with approximately 20 strokes. The milk could already show clear signs of coagulation but it needs to develop further.
- Take the pot off the heat and cover it for 15 minutes.
NOTE – You’ll have the option of making your mozzarella either on your stove or with your microwave. If you want to go the stove route, go ahead and heat a gallon of water in a new pot.
- After 15 minutes, test the curd by making a 2-inch slice with your knife on the surface of the curd. The cut should have sharp and clear lines, and inside you should see yellow whey fill the line. If not, let it set for another 30 minutes. If it never sets, switch brands of milk.
If you have a solid curd (which looks like a pot full of solid shiny yogurt) slice it up into roughly one-inch cubes. Think of a tic-tac-toe grid for this part.
Regardless of whether your curd was one piece that needed to be cut up into cubes, or little pieces from the start, you’re now ready to move on.
- With your smaller curds in hand, turn them on their sides so that the thickest part is facing you, and slice them in half – you want to create a thinner depth on each cube. This can be difficult to do because the shapes are so fluid, so just do the best you can.
- Gently move the cubes back into the pot. Cut any large pieces you find in the process.
- Continue to heat these cubes until the whey reads 110°F for 2-3 minutes (lower the heat to avoid overheating).
- You should see a visible change to the curd at this point too. Look for sharper edges and less-slippery curd. In other words, “less yogurt, more scrambled eggs” look.
- Remove the pot from the heated element on your stove, and set on an unheated element.
MICROWAVE OR NOT?
Now you need to make a decision – will you stretch your mozzarella in hot water by using a microwave or by using your stove? The microwave will be easier, but if you’re a purist, the stove is more traditional – just a bit more challenging.
We’ll start with the microwave method. If you want to go the stovetop route, skip to step 20. (Yes the image below shows a burner – but just imagine it’s a bowl from the microwave and you are ladling from it.)
MAKING MOZZARELLA – MICROWAVE STRETCHING METHOD
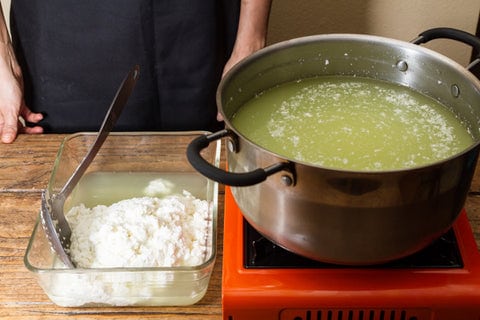
- Ladle the curds into a large microwaveable bowl or flat dish. Try to only put the curds in the bowl – hold back as much whey as possible, keeping the whey in the pot. Also, don’t press the curds if you can help it.
- Microwave the bowl/dish with the curds for 1 minute
- Gently use a spoon to fold the curds over several times and evenly distribute the heat. Drain off any released whey into the pot.
- Microwave for 30 seconds this time. Drain whey again. Add salt (adjust as you like). This is also the time to add herbs. Mix them in by stretching and folding the curd another 10-15 times. Work quickly so you don’t lose too much heat.
- Microwave for another 30 seconds. Drain whey again and fold the curd 10-15 times gently- try stretching. It must be 135°F to stretch properly but do not waste time or heat trying to get a temp reading. You may need to fold the curd a few more times.
NOTE: Every batch is different and mozzarella stretching is highly dependent on proper heat. The curd should ideally get springy and shiny but be patient with this part. It takes practice.
- Feel free to heat one more time for 30 seconds if the curd is tearing- it cooled too much to shape. Once you get a nice stretch, skip down to step 34.
MAKING MOZZARELLA – HOT WATER STRETCHING METHOD
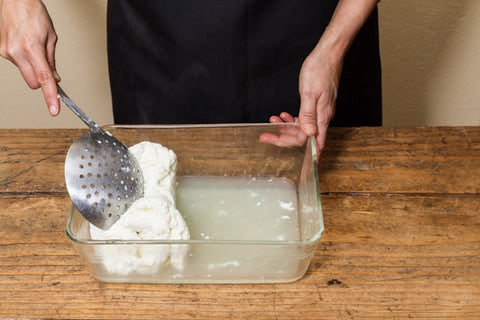
- Scoop your curd into a flat dish as in Step 6. Pour off any excess whey, and flatten the curd gently by pressing with one entire hand (you should see your hand imprint slightly).
- Let the curd rest at room temp for about 10 minutes while you heat some water in the next step.
- For this hot water bath (no microwave) stretching method you’ll need a gallon of water that is simmering at about 185°F. Leave it on the burner in a mid-low setting. It’s ok if it boils- we will temper the curd with leftover whey first.
- Split prepared curd into four portions- you will get better with each portion as you practice. If you’ve done this many times, feel free to heat and stretch all curd at one time.
- Place one portion of the curd in your heat-resistant bowl.
- Ladle 1 cup of the warm whey (not hot water yet!) on top of the curd in the bowl – we are tempering it, i.e. slowly increasing temp.
- Now ladle about 1 cup of hot water on the curd, or enough to cover it. Allow the curd to warm for 3 minutes.
- Pour the new whey/water combo you just created into the whey pot.
- Now, ladle two fresh cups of hot water onto the curd again, making sure it’s covered. Allow it to warm for another 2-3 minutes.
- Feel the curd and see if it feels softer and more rubbery than before. Try to press it together gently and fold it a couple of times.
- Lift the ball out of the water, fold it a couple of times and add 1/2 teaspoon of salt per quarter portion or 2 teaspoons for the whole batch of curd.
- Fold and stretch the curd to blend in the salt (this is when it’s helpful to use light and fast-dissolving cheese salt – if you’re using another salt, cut the quantity by half and fold more).
- If the curd cools too much, repeat the previous step with new hot water once or twice. The curd won’t stretch if it’s not hot enough but we want to avoid overheating as well. This is the craft part that takes patience and practice with mozzarella.
- Repeat heating, stretching, and salting on the remaining 3 portions of curd. If temperamental curds just won’t stretch, just fold, salt, and press warm curds into a bowl to shape them that way.
Practice, practice! It’s better to under-stretch and enjoy a tender farmer’s cheese wheel than to overheat and overhandle, then you’ll end up with a dry rubber ball.
SHAPING MOZZARELLA BALLS
- Take a portion of curd and fold it over itself 3 or 4 times.
- Then hold the curd with one hand as you come up from under the stack with the other hand to push it up from below.
- Use the index finger and thumb of the first hand to make a hole through which to push the stack, then pinch the ball that forms – this is where the name Mozzarella comes from- Mozzare means to cut off in Italian. Repeat. (PS: Enjoy the leftover bits now!)
- Dunk the balls in a bowl of cool water so they don’t flatten.
- Repeat with all curd.
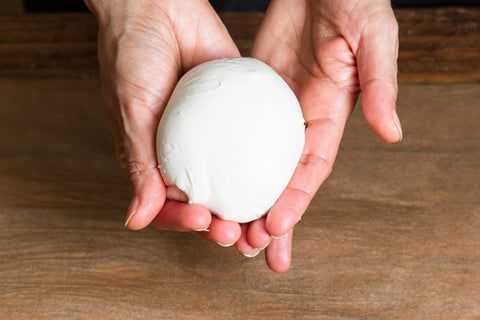
Have fun experimenting with knots and braids if you got a great stretch. And congratulations, you’ve made some tasty mozzarella now.
You can make even more types of cheese with nearly identical supplies, just have a look at the video tutorial below.
In both of these videos, they use vinegar rather than citric acid – which is a pretty common ingredient in most kitchens. But, you can use citric acid or vinegar for similar results.
We hope you have an amazing & delicious time with your new hobby. Let us know how it goes!
Your friends 🙂 @NewHobbyBox